Thursday, January 31, 2008

Sweet Red Pepper Puree


Here is the Sweet Red Pepper Puree that I used as a garnish for the Squash and Pear Timbales and that I used as a dressing for a salad.

Sweet Red Pepper Puree, adapted from The New Vegetarian Epicure

1 or 2 cups chopped sweet onions
1 tablespoon olive oil
salt
2 cups roasted and peeled sweet red or orange peppers
3 tablespoons cider vinegar or to taste
3 tablespoons brown sugar or 2 tablespoons agave nectar or honey or to taste

In a heavy bottomed skillet, cook the onions in the olive oil over low heat until light-golden and soft. Salt lightly.

Meanwhile, roast the peppers either in the oven or on a grill or on the stove top on a griddle or gas flame. Once completely soft, set them aside, covered with a towel for 3 or 4 minutes, to let them sit in their steam to make them easier to peel.

Peel the peppers and add them and the cooked onions to a blender or food processor, along with the sweetener and vinegar and process until smooth. Add salt or more sweetener or more vinegar to taste, if needed.

Warm gently before serving as a garnish to warm dishes. Otherwise it is also good cold on a salad.
Posted by Picasa

Timbales of Squash and Pears

I have been making a lot of squash soup and roasted squash this fall and winter and I wanted a slightly different presentation for a change. So, I decided to try this timbales recipe from the New Vegetarian Epicure by Anna Thomas. I think this would be a great dish for a vegetarian Thanksgiving or Christmas feast; I wish I had noticed it earlier. Although, I found it tricky to unmold them and none of them came out in one piece. Maybe if I used real ramekins (as the dishes I used were too large) and had used finer bread crumbs that would have helped.

The Sweet Red Pepper Puree that she recommends for garnishing it is also great as a dressing for salads, as I did for my Fresh Green Garbanzo Salad. I also discoverd that the puree works well to cover up the flaws in the timbales if they don't unmold in one piece!

Timbales of Squash and Pears, adapted from The New Vegetarian Epicure

1 lb of peeled, cubed squash: Butternut, Tahitian, Kabocha, Hubbard or Acorn
1 lb of peeled, cubed yams or sweet potatoes
1 cup water
1/2 tsp salt
1 or 2 onions
2 1/2 Tablespoons butter
3 medium pears (firm but ripe)
1/2 cup good white wine
1/2 cup heavy cream or whole milk
5 eggs
white pepper to taste
butter and fine bread crumbs for the ramekins

1. Either braise or roast the squash and yams.
To Roast: Coat the cubes of squash and yams lightly with olive oil, sprinkle with salt, and roast in a pan in a 425 degree oven until tender, at least 30 minutes, stirring occassionally. (Omit the 1 cup water).
To Braise: Place the cubes of squash and yams in a heavy-bottomed pan with the water and salt. Cover and simmer on low until the vegetables are completely tender.

2. While the squash and yams are cooking, peel and chop the onions. Melt 2 tablespoons of butter in a skillet and cook the onions slowly, stirring often, until they are caramalized, uniformly golden brown.

3. Meanwhile, peel, core, and dice the pears into 1/4 inch or 1/2 inch cubes. When the onions are soft and brown, remove them from the pan and set aside. Add a bit more butter to the skillet and saute the pears for a few moments. Add the wine, cover tightly and simmer the pears on very low for about 15 to 20 minutes, until poached and tender. Turn on oven to preheat to 325 degrees F.

4. Place the cooked squash, yams, and onions in a blender or food processor with the cream or milk and puree until smooth. Lightly beat the eggs and whisk them into the vegetable puree. Season with salt and white pepper. Then stir in poached pears. (I didn't stir them in, I just placed them on top, as you see in the photo below: this was to illustrate better that there were pears in the dish, otherwise it wouldn't have been obvious).

5. Prepare 8 ramekins or timbale molds or custard cups or the such by buttering them inside thoroughly and then coating them with fine bread crumbs. Divide the squash and pear mixture evenly among the ramekins, filling them a little short of the top. Place the ramekins in a baking pan deep enough to hold water at least halfway up the depth of the molds. Bake that way (with water surrounding the ramekin dishes) in a preheated 325 degree F oven for about 50 minutes.

6. Unmold by sliding a thin knife around the edges of the ramekins and tipping each one onto serving plate. Surround each timbale with a small ribbon of Sweet Red Pepper Puree and serve warm.

Wednesday, January 30, 2008

Fresh Beans

At the farmer's market over the weekend, we saw a huge box of these beans. We asked the woman at the stall what kind of bean they were, and she just shrugged. So, we broke open one of the pods and knew immediately what they were:

Now you know too, right? They are garbanzo beans, also known as chick peas. We never know what we'll find at the farmer's market.

Here I have shucked most of the peas from their pods. I left some of the peas in their pods to eat like edamame. Then I boiled them in a big pot of salted water. Actually, I have heard that some people eat them raw, but I'm not into that.

The garbanzos plumped up a bit and turned a uniform shade of pale green after cooking. I put them into a salad with red onions, garlic, fresh mint, and some roasted red pepper dressing. I'll share the recipe for the dressing in an upcoming post.

Added January 31: here is the recipe for the dressing.

Tuesday, January 29, 2008

Peeking at My Pantry

Lydia, of the Perfect Pantry blog, has set forth an invitation for people to share photos of our pantries. So, here is a glimpse at my various pantry areas, not including my refrigerator. Above shows where most of my spices are located, to the right of my stove on a three-tier rack and in a drawer.

To the left of my stove, in a cupboard, I store most of my vinegars, oils, etc.

And here is my actual pantry, with roll out drawers where most of my dry goods are stored. The top shelf has a lot of my Mexican ingredients: dry hot peppers, herbs/spices, corn husks, etc. Below that are some of my grains and at least a dozen varieties of beans/legumes. The drawer below that contains canned goods, dried fruit, jams, and a big orange bowl packed with sea vegetables. The drawer below that, not pictured, contains teas and baking items like baking powder, cocoa powder, etc. I store all of my nuts and flours and some of my grains in the freezer or refrigerator, and I have at least a dozen varieties of each.

Here is the shelf in the corner where I keep potted herbs. On the counter I present the items I purchased this week at my local farmer's market. It's Florida, so we always have lots of fresh produce available, even in the winter. After taking the photo, I placed some of these items in pretty bowls, which are now on display on my counters, while others have been stored in my refrigerator.


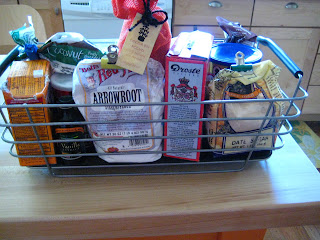
Added March 9: This is unconventional, but I am adding two additional photos of my pantry. Above is my pantry drawer with my teas and baking products. One the thing I like about this drawer is that the boxes of tea are easy to read and see. So I can see at a quick glance what I have. But the best feature is the wire basket. I hold all of my most-used baking products in it:

When I am doing baking, I simply remove from my pantry the wire basket that holds my most-used baking products. Everything is at my fingertips on my counter and clean-up is easy. It's a fantastic system, if I do say so myself!

Monday, January 28, 2008

Sweet Buckwheat Crepes


Since I had plenty of leftover buckwheat crepes, I just had to make a few sweet ones for a special treat. I have been thinking of banana-filled crepes since reading Ana's crepe entry last week in her blog Kitchen Space. I forgot to add extra sweetener to the batter for the sweet crepes, but they still tasted great with the sweet filling.

I made my banana filling by heating some butter in a small skillet. Then I added sliced banana, a bit of cinnamon and a drop of agave nectar and sauteed. Then I added a splash of port and let the alcohol simmer away. Then I grated some nutmeg over the top. Delicious!

DH made the chocolate topping by melting in a double boiler, a chunk of unsweetened chocolate with some agave nectar and a pat of butter. Note, when I reheated the leftover chocolate, I added some warm milk.
Posted by Picasa

Savory Buckwheat Crepes

The first recipe I tried from The New Vegetarian Epicure by Anna Thomas was the buckwheat crepes. It's a great cookbook, and this recipe is delicious and versatile. There is a warning in the recipe that these crepes are extra fragile and tricky to work with, and that is quite true. But the flavor is worth some extra trouble. DH had bought some organic beer from Orlando Brewing when we were visiting Central Florida recently. So, we thought of this recipe, as beer is one of the key ingredients. The crepe batter smells quite strongly of beer, but since I don't drink, I am glad that they don't taste like beer once the crepes are cooked. The buckwheat flavor shines.

Buckwheat Crepes, adapted from the New Vegetarian Epicure

note: make the batter at least two hours before cooking the crepes

1 1/3 cups milk
2 eggs
2 egg whites
1/2 cup beer
1 1/3 cups water
2 tablespoons oil, plus more for the pan
2 tablespoons sugar or agave nectar (optionally add more for sweeter dessert crepes)
1/2 teaspoon salt
2 cups buckwheat flour

Combine the milk, eggs, beer and oil in a blender and process for a few seconds. Add the sugar or sweetener, salt and buckwheat flour and blend again until smooth. Stop and scrape the sides and process until all is smooth and uniform. Pour the batter into a bowl. Cover and refrigerate at least two hours or overnight.

When ready to cook the crepes, uncover the batter and stir. It should have the consistency of heavy cream. If the batter became too thick, thin it with a few spoons of water. Heat a nine inch skillet or a crepe pan. Brush with oil or butter or rub with an oiled paper towel. Ladle 1/4 cup of batter onto the hot pan and immediately tilt and swirl the pan to spread the batter thinly and evenly. I found it helped to use a long, narrow spatula to help spread out the batter. Cook the crepe on medium for about 45 seconds or until the edges are beginning to brown. Loosen the edges gently with an oiled spatula or butter knife, then turn over the crepe to cook the other side for an additional 20 to 30 seconds.

This process takes practice and a few tries before the pan gets to be the right temperature, and you find the right amount of oil, etc. But there is plenty of batter, so don't worry if some crepes don't turn out. The crumbs are great, just save them and sprinkle them over some fruit for breakfast.

Stack the finished crepes on a plate on and keep them covered with a damp towel so they don't dry out.

For these crepes, I made a filling with some purple potatoes, spinach, onion, garlic and fresh thyme. I think the purple potatoes went beautifully with the buckwheat crepes, as they have a slightly blueish tint to them. I also added to them a mixture of grated cheeses: Irish cheddar, Asiago and Fontina.

To assemble, I spread some filling in the middle of each crepe and then wrapped the crepe around the filling like an enchilada or burrito. I placed the filled crepes on a sheet pan lined with a Silpat and kept them loosely covered with foil. When the pan was filled, I placed it in a preheated 350 degree F oven and cooked them, still loosely covered, for about 10 or 15 minutes, until the cheese was melted.

Note: looks like I was on the same wavelength as fellow-blogger and friend Madelyn when it came to making potatoes this weekend. See her blog entry about 2008, Year of the Potato.

Thursday, January 24, 2008

Polynesian Salad

DH and I were just in Orlando for a few days. So, we ate more meals in restaurants than we had in quite some time. We were happy to find some new (to us) vegetarian and vegan-friendly restaurants there. One thing that we noticed though, is that even though many restaurants have vegetarian options, the options often lacked balance. The most common item missing was a protein. Penne pasta topped with pesto and grilled vegetables is not a complete meal; nor is a shepherd's pie that contains only potatoes and vegetables, etc. We found ourselves constantly scanning the menus for (and not finding) a complete vegetarian source of protein.

So we were very happy to find the Dandelion Communitea Cafe, where every meal offered was vegetarian (or could be served vegan) and was nutritious. Not only that, but they also promote OurLando Locally Made, a local business movement that is gaining momentum. See their website for information about the Orlando area food culture.

I am highlighting here two of the items DH and I shared there. At the top is the Polynesian Banana Fantasy Salad. Not only was the salad packed with delicious fruits and vegetables, but it also had several protein sources: walnuts, soy-based dressing, and hummus with whole grain crackers. It was so memorable, I made a salad at home inspired by it. See bottom. Directly above is a photo of Henry's Hearty Chili, which was delicious and packed with vegetables, tofu and kidney beans and optionally topped with cheese.

Polynesian Salad, inspired by Dandelion Communitea Cafe

lettuce
cucumber, seeded, peeled and chopped
carrot, shredded
celery, sliced
walnuts, roughly chopped
fresh grapes OR raisins OR other dried fruit
slices of banana
unsweetened dry shredded coconut (sprinkled on top as garnish)

Arrange the salad ingredients in bowl or on a plate. Serve with Curry Yogurt Dressing, see below:

Curry Yogurt Dressing, enough for at least four servings of salad

1 7oz container plain unsweetened yogurt (I like using Greek style)
the juice from one small lemon or from half of a large lemon
1 teaspoon curry powder
1/2 teaspoon turmeric
1 teaspoon cumin
1 to 2 tablespoons agave nectar or honey (to taste)
optional: 1 teaspoon mustard to give it a stronger yellow color
optional: milk or soy milk to thin to consistency desired, if needed

Stir together the ingredients. Pour on top of salad or serve on the side for dipping.

Barbecued Tofu or Tempeh

As a vegetarian, there are plenty of products marketed to me as substitutes for barbecues. There are frozen soy barbecue "ribs", refrigerated packages of barbecue tofu, and bottles of vegetarian BBQ sauces, etc. But I don't buy any of them. A simple barbecue sauce is very easy to make, and that way I can control the ingredients.

Above my sauce is pictured with firm grilled tofu and below I used it when baking tempeh. You will notice that when using tofu, the sauce isn't absorbed very much. Whereas, tempeh absorbs all of the sauce as it cooks. If you want your tempeh to be saucier, either make a larger batch of the sauce, or add some water to the sauce.

Easy Vegetarian Barbecue Tofu or Tempeh

1 package of tofu or tempeh, cut into thin slices if needed (see photos for guidance)

1 tablespoon agave nectar
1 teaspoon (or more for spicier) chipotle habanero pepper sauce OR your favorite spicy sauce OR chili powder OR a dash of cayenne pepper
3 tablespoons walnut oil or other oil
1 tablespoon Shoyu or Tamari or soy sauce
2 tablespoons vinegar: brown rice or apple cider vinegar or other vinegar
2 cloves garlic, minced
optional ingredients: a tablespoon of your favorite mustard; 1 teaspoon of cumin, oregano or your favorite spice; and/or a bit of minced ginger and minced onion; water to thin the sauce if using tempeh and want it saucier

1. Preheat oven to 350 degrees.
2. In the pan you will be baking the tempeh or tofu, stir together the barbecue sauce ingredients (no extra dirty dishes!).
3. Coat both sides of the tempeh or tofu with the sauce. Lay the slices of tofu or tempeh in a single layer in the baking pan and bake for 20 to 30 minutes, turning/flipping over at least once in the middle of baking.

NOTE: the tempeh I used is Artie's Tempeh, made in Gainesville, FL and the package comes with four servings.

Wednesday, January 16, 2008

Some more thoughts on my weight loss

In my previous entry, I highlighted the things I eat since I changed my diet. But, I didn't talk about what steps I took that I think contributed most to my weight loss. So maybe it is helpful to share some of the changes I have made that have resulted in better eating habits.

Essentially, the biggest change I made was committing to cooking my own food. Like a lot of people, I used to think of cooking and meal planning as a dreaded chore. As a result, I cooked as infrequently as I could get away with. At most I would cook two or three dinners a week, eating the leftovers for the rest of the dinners. If there were no leftovers to eat, and I didn't feel like cooking, we would eat cereal, even popcorn for dinner!!! For lunch, I never had a plan for what I was going to eat, so I would eat something inappropriate, and then would end up grazing all afternoon because I didn't feel full. So, now here is what I do:

  • I cook breakfast from scratch every morning. I can't remember the last time I bought a pre-made cereal or instant breakfast product. I used to eat huge bowls of cereal for breakfast, and sometimes for snacks, and as I mentioned, sometimes for dinner... If this seems like a lot of work, I have found a few shortcuts that help. If I make pancakes or waffles and don't have time to cook the whole batch, I cook only what is needed for that meal, and then I place the rest of the batter in the refrigerator. Then the next day, all I need to do is heat my griddle and the batter is ready to cook. Or if I do have time to cook the whole batch the first day, I do. Then the next morning, to reheat the waffles or pancakes, I just place them briefly in the toaster for an instant breakfast. Or another thing I do for breakfast, if I have a small amount vegetable leftovers that isn't enough for lunch, I will add them to some scrambled eggs, etc.

  • I eat a balanced lunch. The best part of it is that I normally have to make no effort at all to eat a healthy lunch now, because most days, I eat the leftovers from the previous night's dinner. If for some reason I find I am hungry after lunch, instead of snacking on sugary junk food, I think about my lunch to see what was missing or lacking in it: maybe I need to eat some nuts to get a bit more protein and fat to feel more full or maybe I need some carrots or fruit.

  • Now I cook a fresh dinner every night. This is the major change for me. But the best thing that came from it is that I now find cooking to be entertainment. Often DH will arrive home from work while I am still cooking dinner, and he will help. It is actually fun to cook together. On weekends for entertainment, sometimes we will think of a complicated dish and will spend hours cooking it. Sometimes it will mean going to the farmer's market first to get the fresh produce we will need for the meal, etc. And every week DH makes homemade bread, etc. We know that anything we prepare at home is going to have more value (price value, nutrition value and intrinsic value) than any meal we would get at a restaurant. We rarely eat out, and when we do, it is because we are out of town.

The other thing that helped me lose weight, besides eating balanced meals, is that I broke my addiction to refined sugar. It is out of my life, and I don't miss it at all. I still eat sweet things, but I sweeten them as little as possible, with natural sweeteners like agave nectar. And I make sure that my desserts aren't just empty calories; there must be something nutritious in it: whole grains, fruit, nuts, etc.

Another thing that has really helped me is changing what I drink. I don't drink anything that has calories or that is artificially calorie-free. I only drink water and herbal tea; my indulgence is a cup of espresso per day. I drink my coffee black or with whole milk, but I never sweeten it. Other than adding milk to my coffee, I don't drink it as a beverage. (I used to drink milk and soy milk as a beverage). Extremely rarely, only on special occasions, I will make spritzers made with ice and lemon or lime or other fruit and agave nectar.

Anyway, those are some of the highlights of my new habits. Mainly, I am now cooking more than I ever have in my life. I think using more of my time for cooking is a worthwhile endeavor. The extra effort it takes to cook my own food rewards me with vastly higher energy levels than I've had since my early twenties. In the past I would use my extra time doing sedentary things, while eating unhealthy food, resulting in continual weight gain. Now, I am spending less time on the computer or in front of a television, because I am now cooking and eating healthy, and my life is much more enriched.

Monday, January 14, 2008

Weight Goal Reached!

I have great news! I hadn't weighed myself in a few weeks, but had been getting so many comments on how thin I am looking, and have noticed a difference in the fit of my clothes. So, I decided it must be time to check the scale again. To my surprise, not only have I reached my goal, but I lost a pound more than my goal! So my body mass index is now at a normal, healthy level. I feel better than I have in years. I have energy I didn't have a year ago, and now can wear clothing in a size I hadn't worn in years and years.

I am happier with the food I am eating now than I have ever been in my life. I don't feel deprived of anything, as I have not been on a diet, in the weight-loss definition of diet. What I did was change my way of eating; it is a permanent change. I am amazed because I lost a significant amount of weight (at least 45 pounds), while eating all of the foods I love.

I think a lot of times diet is defined in negative terms: in terms of what a person doesn't eat. This is especially true when you are a vegetarian. I am a vegetarian, so I DON'T eat meat. But it doesn't really stress all of the great things I DO eat.

So here is a summary of what I DO eat:

breads
whole grains
nuts and seeds
tofu and tempeh
legumes/beans
eggs
whole milk
cheese
yogurt
coconut milk
butter
vegetables
sea vegetables
herbs and spices
fruits
oils (mainly olive oil, walnut oil, grapeseed oil, coconut oil and flaxseed oil)
desserts that have nutrition and are sweetened with agave nectar, maple syrup, maple sugar or date sugar
coffee
tea
salt

Basically I eat food that is natural, whole, organic when feasible, grown locally when possible, and in season when possible. I choose the best possible food available to me within my budget, based on how I want to live.

Monday, January 7, 2008

Braided Brioche

DH and I decided to observe the Mexican tradition of making a Rosca de Reyes on January 6. It was actually a great excuse to try making a braided bread. We used the recipe for Poor Man's Brioche in Peter Reinhart's Bread Baker's Apprentice, and formed the bread as if it were a Rosca. In hindsight, I suppose we should have adorned it with fruit. But honestly, the dough smelled so wonderful, we were too eager to bake and eat it!

It turned out quite lovely, if I do say so myself.

Considering we used the recipe with the least amount of butter, we weren't expecting the flavor or color to be strong. But, wow, the bread has an incredible yellow color and a rich buttery flavor nonetheless. The color is most likely thanks to the farm fresh eggs we get each week from the CSA farm.

I am continually amazed with bread, how such simple ingredients can taste so differently from one bread recipe to another.
Posted by Picasa

Friday, January 4, 2008

Rosca de Reyes

In Mexico the Day of the Three Kings or the Epiphany (January 6), is celebrated by gathering with friends and family and sharing a Rosca de Reyes. A Rosca de Reyes, or Three Kings Ring, is a rich bread that is shaped in a circle and is usually adorned on the top with nuts or fruits. But the real surprise is that there is a plastic baby doll hidden inside to symbolize Jesus. There are many versions of this tradition, but one way is that the person who finds the baby doll hidden inside their piece of the bread has the honor of hosting the next party on February 2, inviting everyone present at the January 6 party to attend.

I took these photos probably over ten years ago, when DH and I were celebrating the holidays with his family in Mexico. So, quality of the photos is not the best, as they have been scanned and cropped considerably. The top photo is the finished bread just before it is cut.

Here my mother-in-law is braiding the dough.

Above, the photo is overexposed. But if you magnify the photo, you can see in the foreground the plastic baby dolls found hidden in a piece of the bread. My mother-in-law hid several plastic dolls in the ring, to ensure that someone would get one, and somehow Pedro and I both got one.

Veronica's Lentil Loaf

When I made lentils for Christmas lunch, I purposely made extra to use in a lentil loaf. I use a couple of different recipes when making the loaves. This time I used Veronica's Veggie Meatloaf with Checca Sauce recipe, posted here. I don't like using the word meatloaf in the title of a vegetarian recipe, so I prefer calling it Veronica's Lentil Loaf. One note I can add about the recipe is that I have had success substituting marinara sauce for the Checca Sauce. Also, Fontina cheese is delicious on top of it, instead of or combined with the mozzarella. And, I typically will turn up the heat of the oven to 450 degrees F for the last five to ten minutes of baking to give the cheese a golden crust.

Saturday, December 29, 2007

Christmas Meals

I was so absorbed cooking and being a host for Christmas, that I didn't take very many photos. Above is a photo of our Christmas lunch, but before the table was finished being set. My mom made the gorgeous quilt that is in the center. It's great that she thought to bring it with her, because it adds so much to the table.

From the top to the bottom there is wine, French lentils with a creamy mushroom sauce, coleslaw, whipped white beans with black truffle oil, quinoa pilaf, tomato and cucumber salad with dill dressing, babaganoush (eggplant), and greens with walnuts and nutmeg. Also on the table is a goblet of lemon-lime spritzer for me, since I don't drink alcohol. Another drink, not pictured, that we had following dinner was coquito, a traditional Puerto Rican drink featured on my friend Madelyn's blog. There was freshly baked bread being cut in the kitchen that hadn't made it to the table yet, as well as a pumpkin soup. Actually, the soup never made it to the table; we ended up eating it for lunch the following day with some of our savory ciabatta bread and a salad.

For Christmas Eve dinner we made individual pizzas with a selection of toppings on homemade 100% whole wheat crust.

Christmas Snacks

Here are some photos of some of the snacks we made for the holidays. Above are homemade wholegrain crackers with a homemade cream cheese spread.
Above are almonds and pecans that I roasted with maple syrup, cinnamon and ground nutmeg and cloves.

Above are low-sugar roll-out cookies decorated with natural ingredients: shredded dry coconut, chopped pistachios, chopped dried cranberries and cherries, and maple sugar dyed with currant juice.

I forgot to get a photo of our chocolate fondue that was served with chunks of fresh fruit: bananas, pineapple, apples, strawberries, and pears.
Posted by Picasa

Leek and Mushroom Quiche

We had a very nice Christmas with family and friends. For Christmas breakfast, I made a quiche. I used the recipes provided by Smitten Kitchen at this link for Leek and Mushroom Quiche. I ended up using a 12 inch quiche pan instead of a 9 inch, so I had to guess how to alter the recipe so that the crust and filling would fill the pan. But it worked out fine, and the important thing is that it was delicious!

Posted by Picasa

Saturday, December 22, 2007

Chocolate Chip Banana Nut Cookies

I am really looking forward to having family over for Christmas. I have been preparing menus and making preparations. But, I have gotten a late start at making Christmas cookies. Since I have lost around 40 pounds, I really do not want to fall back into old patterns of eating during the holidays. So I am making some less traditional recipes that use less sugar. Here is one that produces cookies with plenty of flavor and a nice texture, but only calls for a cup of chocolate chips (rather than a whole bag) and a 1/2 cup of sugar.

Chocolate Chip Banana Nut Cookies
makes around 3 dozen

1 1/2 cups flour (I used a mixture of whole wheat and all-purpose)
1/2 teaspoon soda
1/2 teaspoon salt
1/2 teaspoon cinnamon
3/4 cup butter
1/2 cup sugar (I use maple sugar) or more if the bananas aren't super ripe and sweet
1 egg
1 teaspoon vanilla
1 cup mashed very ripe bananas (about 2 bananas)
1 3/4 cups oats
1 cup chocolate chips
1 cup chopped nuts

Preheat oven to 350 degrees F.

1. Cream the butter with the sugar, add the egg and vanilla and beat until incorporated. Mix in the mashed banana.
2. In a separate bowl, stir together the flour, soda, salt, and cinnamon. Add to the butter mixture, bit by bit, until thoroughly combined. Stir in the oats, then the chocolate chips and nuts.
3. Place one tablespoon of dough per cookie on a cookie sheet. Flatten slightly. Bake for 12 to 14 minutes, until golden. Cool for five minutes on the cookie sheet, then transfer the cookies to a cooling rack to cool completely.

Note: I find this dough forms great cookies if you put the raw dough in the refrigerator to chill it slightly before forming the cookies and baking. The cookies may need an additional minute or two of baking if the dough is quite cold.

Tuesday, December 18, 2007

Holiday Ciabatta Bread

In the previous entry, I showed photos of the process of making both sweet and savory ciabatta breads. But, the previous entry focuses on the savory version. So, here are photos of the chocolate and fruit-filled ciabatta that we made on the same day. To see my photos of the Chef's Choice class at Johnson & Wales making this bread, click here.

We added chocolate chips and dried cranberries, figs, dates, raisins and pecans to this dough. We shaped it into thin loaves.

After they baked, we let them cool thoroughly and then we wrapped them in paper to give as gifts. This bread is great sliced, toasted and topped with butter, peanut butter, jam or cheese.

Making Vegetable-Filled Ciabatta Bread

This ciabatta is great for making panini style sandwiches. Inside these loaves we have mixed in sauteed red pepper, sun-dried tomatoes and mushrooms. We learned how to make both sweet and savory ciabatta at the Chef's Choice Artisan Bread Class at Johnson & Wales. These photos show DH and I making it at home.

The day before making the bread we assembled the above biga for a large batch of dough. It contains bread flour, spelt and rye flours, salt and a tiny bit of active dry yeast. After sitting on the counter overnight, it had grown to the size shown above.

We added to the biga more flour, water, salt and a tiny bit more active dry yeast. The bulk of the rising power of the bread is coming from the biga. Then we divided the dough into two parts. The tubs above contain the two different kinds of ciabatta we made. In the top tub, the dough contains dried fruit and chocolate chips. In the bottom section of the tub, the dough contains the sauteed mushrooms, red pepper and sun-dried tomatoes. Below is a close-up of the savory ciabatta dough.

The doughs sat on the counter to continue to develop. Two different times, we stretched and folded the dough. Then we shaped the dough into the desired loaf styles. We placed the loaves onto floured parchment paper that we had placed on the top of upside-down sheet pans.

Then we placed heavily floured cloths over the top of the shaped loaves. We used brown rice flour for this purpose.
We let the loaves sit for their final proofing under the floured cloths until they were ready to bake. Then we removed the cloths and slid the loaves, parchment paper and all, into a hot oven to bake on a pizza stone.